Search This Blog

Showing posts with label baking. Show all posts

Thursday, December 22, 2016

Choco Orange Christmas Fruitcake and an early Christmas tea

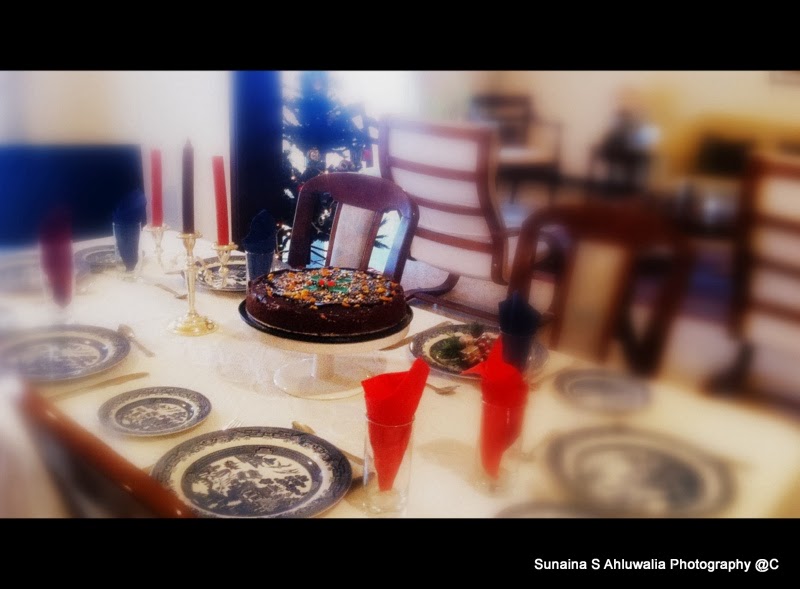
An anonymous writer once famously said, "Until one feels the spirit of Christmas, there is no Christmas. All else is outward display-so much tinsel and decorations. For it isn't the holly, it isn't the snow. It isn't the tree not the firelight's glow. It's the warmth that comes to the hearts of men when the Christmas spirit returns again." I couldn't agree more and this is exactly why we chose to celebrate an early Christmas yesterday, Saturday, the 21st. At the outset, I must confess that my recipe for the Chocolate Orange Christmas Fruitcake is not entirely original but a combination of a few recipes I'd seen in cookery books. A couple of months ago, I had tried out a recipe for a chocolate orange cake and my husband Avi had told me that it reminded him of a Christmas cake. So that really was the starting point for this cake and all I did was tweak that recipe a bit, added some rum, lots of fruit and there it was- my version of a Chocolate Orange Christmas Fruitcake which can easily keep in a closed box for two to three weeks.
Ingredients 600 grams mixed dried fruit 175 grams unsalted butter 250 grams dark brown sugar 500 ml dark rum juice and zest of 3 oranges salt - a pinch 3 large eggs (beaten) 250 grams plain flour ½ teaspoon baking powder 1/2 teaspoon baking soda ¼ teaspoon cinnamon ¼ teaspoon ground cloves Method Preheat the oven to 150°C/300°F. Grease and flour the sides and bottom of a deep 20cm / 8-inch round cake tin, ensuring that no space is left un coated. Put the dried fruit, butter, sugar, range juice and zests into a large wide saucepan and bring to the boil gently, stirring asthe butter melts. Simmer the mixture for 10 minutes, then take it off the heat and leave to stand for 30 minutes. Now, add the beaten eggs, flour, baking powder and spices and stir to combine. Gently pour the fruit cake mixture into the prepared cake tin. Place in the oven and bake for at least 1 hour. You will know if its ready when there is a beautiful citrusy, boozy aroma all over the house and the top of the cake should be firm, dry and have cracked somewhat. To ensure its cooked, insert a cake tester into the middle of the cake and it may come out a little sticky.No problem - that really tells you that it is perfectly soft and moist from the inside Put the cake on a cooling rack and leave it to cool for a couple of hours.Once it has cooled completely, un-mould it from the tin and wrap the cake well in a layer of grease proof paper till you want to decorate it. Decorating the cake Top with some beautiful edible fruits, add to it some little decorative silver and pink edible balls, freshly grated orange zest and the cake was decorated in about 5 minutes. For your own take on decorations, use your imagination- you can use icing sugar, marzipan, chocolate etc but do it in the way that suits you the best.Always remember that half the fun lies in experimenting and that is exactly what will also set you apart from the rest. Now that the Christmas cake has been tackled, its time to start thinking of something else. Cookies, mince pies, rum balls........my thinking cap is well and truly on. In the meantime, here's wishing all of you a Merry Christsmas !

Tuesday, July 14, 2015

Love Muffins? Then try this easy Banana, Raisin and Nut version

Then there are the days when you want a quick and tasty 'anytime' treat. 

Looking around, you find the bananas seem to be slightly over ripe  but there's a wonderful way to deal with that.

Then look into the kitchen cupboard, find things, pre-heat the oven and its time to bake.


Banana, Raisin and Nut muffins
Ingredients


2 cups all-purpose flour 

1 cup sugar 

1 teaspoon baking powder 

Half teaspoon salt

Cashew nuts chopped into bits 

20 raisins 

1/2 cup unsalted butter at room temperature 

2 eggs 

a dash of vanilla extract 


2 ripe bananas.


All set to proceed


Method

Pre heat oven to  100 C and prepare the muffin cases by lightly greasing them from inside.

In a large bowl combine the flour, sugar, baking powder, salt, cinnamon, and nuts. 


Combine the mashed bananas, eggs, melted butter, and vanilla in a large bowl.


Add the flour, baking powder, sugar and blend into the banana mixture.


Spoon this batter into the muffin cases, leaving enough space for them to rise.


I managed 11 large muffins

Bake until muffins are  golden brown and a toothpick inserted in the center comes out clean. 


Looking good and smelling delightful!

Once they are ready, you can serve them with honey drizzled on top, or try vanilla ice cream and honey.

Best of all, just sit back and enjoy one with a large mug of coffee..


             Golden brown and smelling great

Which is exactly what I'm going to do next!

Monday, September 29, 2014

Festive Strawberry Muffins


Food is not about impressing people It's about making them feel comfortable." said Ina Garten, in  'The Barefoot Contessa Cookbook and thats exactly the way I approach cooking or baking.

For me, the food that I cook has to be quick and  tasty. And I'm positive that many of you feel exactly the same way.

In this post, I'm talking about home made strawberry muffins. They could have been presented very simply but because its the festive season, I'm choosing to present the 'dressed up' version.

Festive Strawberry Muffins


Ingredients for 8 large muffins

2 cups all purpose flour

1 cup sugar

Half cup chopped strawberries( frozen/fresh)

2 whole eggs

250 gms butter

1/2 cup milk/yogurt

vanilla essence

1 tsp baking powder

Method

Prepare the muffin tin with greased and lined muffin tins.


Mix all the dry ingredients in a  mixing bowl.


Mix and gently stir the wet ingredients- butter, eggs, vanilla and strawberry essences, in another dry mixing bowl.Make sure that the mix is uniform and not too thick or too thin.


Slowly fold in the chopped strawberries and keep the prepared mix aside.


Combine the wet ingredients with the dry ones and fold in gently to get a uniform mix.


Bake in a preheated oven at 150 C for 25/30 mins and insert a dry toothpick to see if the muffins are ready.


Keep on a wire rack to cool .


Once the muffins have cooled, dust with icing sugar and dec
orate with edible sugar decorations.


Sit back and enjoy these anytime treats accompanied with a hot cup of tea or coffee and make sure you share them with friends and family.

Then watch their faces light up with joy!

And remember, the festive season just got started...


Tuesday, August 19, 2014

A perfect 'anytime' treat- Home made Fig, Orange and Lemon Biscotti


Looking for that perfect anytime treat? Something that can be had with your tea, coffee or best of all easily be served up as a dessert? Then, it has to be Biscotti- easy to make at home and can be made with just about any ingredient you may have lying in your kitchen cabinets.

Biscotti also known as cantuccini  are twice baked cookies originating in the Italian  city of Prato. The biscuits are oblong-shaped biscuits, made dry and crunchy through cutting the loaf of dough while still fresh from baking in the oven.


Fig, Orange and  lemon Biscotti

Today, biscotti are made using many different ingredients. Almonds, figs, pistachios, raisins, cranberries, and lemon & orange zest make for great flavors in this cookie and can be mixed and matched depending on their availability.  

I made these with wholewheat  flour, figs, orange and lemon zest, creamed with butter and sugar .

Ingredients

2 cups wholewheat flour
1 and a half  cups sugar
350 gms butter
3 whole eggs
Figs to taste 
Grated zest of  one lemon and orange ( each)
1 tsp baking powder

Method

Put all the dry ingredients together in a bowl and mix thoroughly.

Combine all the wet ingredients and stir briskly.

Combine the two and make into a clean oval shaped dough.

Put cling film and pop into the frig for 1 hour.

Bake in a pre heated oven art 125 C for 30-35 mins

Bake at  125  C for 30-35 mins


Allow to rest on a wire rack.

Then cut into pieces and bake for another 15 mins till golden brown.


Cut into pieces and bake again for about 15 mins 


Dust with icing sugar and serve with tea, coffee or simply as dessert

We tried it with whipped cream and berries- made for a delightfully decadent dessert.

Try your own variations and let me know too.


Tuesday, May 20, 2014

Learning more about French Pastry and Bread-My visit to Caramel French Bakery and Pastry, Muscat

What does it really take to perfect a flawless chocolate éclair? A delicious baguette?To pipe dozens of macarons? To bake an amazing 'melt in the mouth' Opera cake? Questions like this have come to my mind frequently, and in order to find answers to all these and many more, I spent a delightful morning at the Caramel French Bakery in Muscat yesterday.

The first thing that hit me as I entered the bakery in Al Ghubra, was the delicious aroma that floated all around. It was a combination of bread, pastry, chocolate and cheese all rolled into one. Must confess, if I hadn't eaten breakfast before setting off, it would probably have had me salivating! 

Caramel Bakery-Packed with the best quality eclairs, pastries, cronuts, tarts, breads and so much more
I was greeted by the very polite French manager Mr. Pacombe who gave me a short brief about the place and introduced me to Eloise Traboulsi, the owner of Caramel. Caramel opened its first boutique and kiosk in Muscat in January 2010.  The initiative of Eloise Traboulsi, a French citizen living in the Gulf for the past 7 years, was the driving force and today Caramel combines her passion for pastry and bakery into a very successful business model for aspiring youngsters.

I was informed that in order to make such exquisite creations possible and produce the very best of traditional French bakery and pastry products, Eloise has introduced top of the range equipment and the finest ingredients coupled with the long experience of Caramel’s professional team.One look as I entered the Bakery and Pastry sections and I knew that it was truly a labour of love combined with the highest standards of professionalism reflected in the cutting edge technology of the machines and equipment being used by them. 


Eloise Traboulsi -the founder 


With their  motto,' Your satisfaction is our challenge' Caramel takes pride in sharing the fact that they cater to many Corporate and Private companies around.They have a standard menu for customers ready reference or their product range can be catered based on personal preferences as well.

Tempting treats and breads 


It was only 10 am and the shop was already packed with goodies.
In addition to  breads, and regular pastries I found cronuts, a new addition.
The Cronut is a unique creation by Chef Dominique Ansel that many have 
described to be a croissant -doughnut hybrid.After its launch in May 2013, 
cronut pastry fans were created all over the world, making it the 
most virally talked about dessert item in history.
A wide range of cronuts

I was introduced to the team working at the bakery and just ten minutes 
later, I understood exactly why Caramel is such a success.
Simply put, they have the most dedicated team of professionals
and the bakery works 24 hours a day. Add to it
smiling faces and effortless ease at their job and
there you have it!


Breads which taste even better than they look-The Bakery works 24 hours a day


Spinach Quiches just before baking


Pastry Chef Sebastian Gomes working on a Birthday Cake 


 All Smiles- while Chef Makram works on the day's plan 

Thank You Mr Pacombe- I really enjoyed the visit!


You really could be in Paris


I really could have spent a lot of time there 
but since I had other things planned, I had to leave.
I was really and truly happy, having learnt a great deal 
as well  tasting some French delights.
  
And if any of you are wondering how you can 
make your way to Caramel 
I've added the location map just below for your convenience. 

Would love to know what you thought...

The Location Map- Caramel

Friday, November 1, 2013

A Diwali Special- Neha's Passion Fruit and Raspberry Tart

Photo: #passionfruit and #raspberry #tart
Neha's 'melt in the mouth" Passion Fruit and Raspberry Tart


We are now looking forward to Diwali  and while many of us are happy to make the traditional Indian sweets at home if we are actually able to, others usually head out to the sweet shops and pick up the beautifully wrapped boxes with ready made sweets and gift them to family and friends.

But if you happen to be hosting your very own Diwali 'do' and want a 'piece de resistance' for your party, there is nothing quite like this tart! I'm now  going to share the recipe for Neha Singh's special melt in the mouth Passion Fruit and Raspberry tart. While 'Commis' Pastry Chef, Neha  is currently further refining her  baking skills at the Bonnie Gordon School of Confectionary Arts in Toronto learning how to make Designer cakes, I've really had the benefit of watching her at work during her short stay at home and am happy to share it with all of you.

Believe me when I tell  you that its really easy- all you need is the right ingredients, patience and thats about all...


Getting the fruit ready to make the passion fruit cream 

Just like the Apple Tart recipe I shared some time ago, the base is made from scratch. Starting with rolling the all purpose flour mixed with some butter to make the pastry , she popped the ball into the freezer  to chill for about 15 minutes while she got the other ingredients ready.


Line the tart case with the pastry , fill it with beans and blind bake for about 20 mins


Use only the best and freshest raspberries to make the raspberry sauce


Make a thick sauce with a little sugar and leave to cool
Make the passion fruit cream by cooking the fruit with a little butter and sugar and stirring till a thick yet fluffy consistency is achieved. 

Leave to cool.


Layer the tart- first the raspberry filling and then the passion fruit cream


Photo: #passionfruit and #raspberry #tart


Finally decorate with a few raspberries , passion fruit seeds and a dash of icing sugar.

Cut into 6-8 slices and enjoy!


Thursday, October 3, 2013

Thirty minute Apple Tart

A warm slice of apple tart with coffee or better still, topped with vanilla ice cream- I couldn't think of a better way to  catch up with friends. In the past, I've tried to make a  simple version of an apple tart and succeeded reasonably well. 

But when I recently had the opportunity to watch my Le Cordon Bleu, Paris  trained daughter Neha Singh making this classic 30 minute apple tart from scratch, I knew that I was going to learn a lot. 

And I was right...

In the oven- Neha's 30 min classic apple tart


Starting with rolling the all purpose flour mixed with some butter to make the pastry from scratch, she popped the ball into the freezer  to chill for about 15 minutes while she got the other ingredients ready.


Lining the tart case and trimming off the edges 


This was then blind baked for about 20 minutes in a preheated oven after adding some beans to ensure that the case baked as close to perfection as possible.
Filled and almost ready to bake
For the filling Neha used Honey crisp apples.  This apple has exceptionally crisp, juicy, sweet-as-honey flesh with just a hint of tartness that makes it a tasty treat any time of the day.. As far as I'm concerned, its even more delicious when used to bake an apple tart.
Layered over with finely sliced apples 
The filling used brown sugar, cinnamon, water and was heated on a low heat gas stove till the mixture was tender.


Baked till golden brown for 30 mins


We had people coming over that day and Neha had yet another treat in store- a Passion fruit and raspberry pie which had been made the previous evening and left to chill in the refrigerator. 

But that's another story ...for another post.....

Memories are made of this